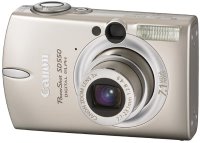
DIY Canon Powershot SD550 LCD Repair
 I have a Canon "digital elph" model SD550 digital camera. I had it in my pocket when I rode the SheiKra roller-coaster at Busch Gardens in Tampa. The ride cracked the LCD display on the back of the camera, making it more or less impossible to change any of the settings, review pictures, etc. Luckily, I hadn't put it in any wierd sepia/black and white type of mode, and could continue taking pictures using the optical viewfinder.
Canon wnted $150 to repair the camera. Cracked LCDs are not covered under regular warranty work. That seemed a little steep to me. I called the Canon parts department (open M-F 8-5; 732-521-7230) and ordered the replacement part for $50. I bought a set of Kronus screwdrivers drivers at Radio Shack to work with the small philips screws on the camera.
Repair instructions, as I did it (warning: no warranty, try this at your own risk ,etc).
Remove the battery. Remove all of the external screws and put them someplace safe. Keep track of which screw goes in which hole. Carefully separate the two halves of the camera shell. Remove the metal bar (held in with one screw on the left and a nub at the right) along the top of the LCD. Release the LCD's four small metal/plastic tabs and lift it away. The backlight is underneath. The cable from the LCD runs beneath it, so it must be carefully lifted away as well. The cable for the LCD is taped to the back of the backlight. Carefully remove the cable and cover up the sticky spot with a slip of paper. Remove the two screws holding in the metal harness for the control buttons. Lift it away to reveal the socket into which the LCD cable goes. Lift the black hinged tab, carefully, and slide out the ribbon cable. Put the broken LCD away. Insert the ribbon cable for the new LCD in the same orientation, and push down the hinged tab. Replace the buttons and screws. Replace the backlight. Mount the LCD back into its tabs. Replace the metal bar. Reassemble the case, and screw everything back together.
It's not hard, Just be careful and work in a place with a lot of light and no breeze.
<< Home